Troubleshooting guide by Vítězslav Částka (good luck with the pronunciation)
¶ Interesting Notes
- There are 2 Moonlight units available; a standalone Moonlight DVR/Cam ("BYO-VTX") and a unit with the Moonlight recording board paired with a HD V2 Dual VTX ("KIT").
- In circulation there are a few revisions of the Moonlight KIT unit with slightly different internals in regards to the connection details between the components but the PCBs are always the same.
- The Moonlight Kit contains HD V2 Dual VTX board and Recording board. Unfortunately even the HD V2 VTX board has onboard memory, the moonlight does not record the video on this board at all and it is sad, because you can get to the memory when you connect the standard tiny VTX cable used for HD V2 VTX.
¶ Corrupted video files
There are many circumstances that can cause a corrupted video file, but most of the time I would consider these:
- You have disconnected the battery before the video file was saved properly
- The connection got lost during the flight many times and some unstability of the firmware caused an error.
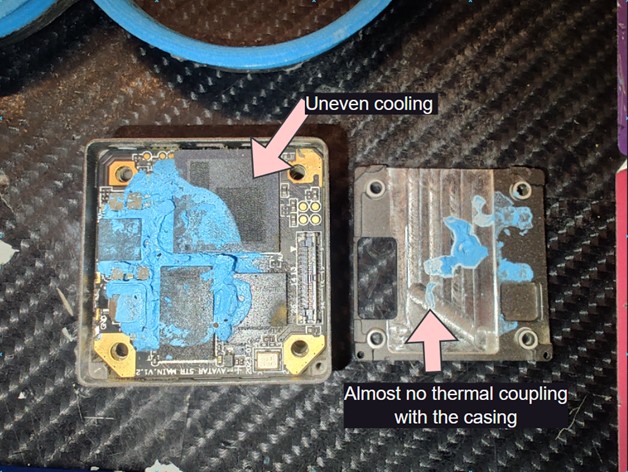
- The moonlight kit has some QC issues and remaking the thermals inside would solve the problem.
- Video repair tool: https://github.com/anthwlock/untrunc
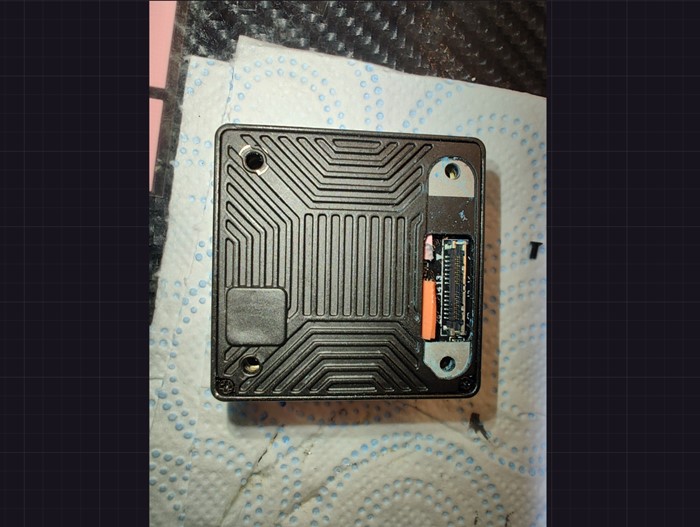
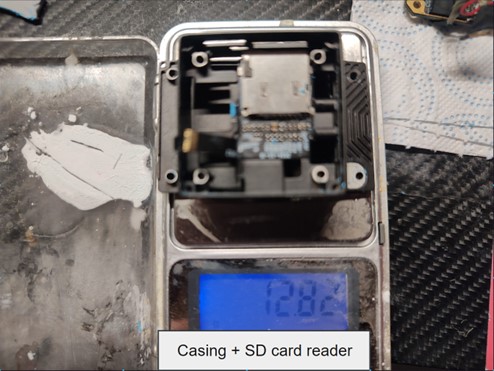
¶ De-cased / Naked Moonlight ("BYO-VTX")
Given the nature of the Moonlight units it wouldn’t be recommended to de-case them. They create excessive amount of heat when recording 4k60fps, because of the amount of processing power needed. Also, in order to de-case the unit you will need to unmount the cardreader that is glued inside the case. Doing so is likely to cause unrepairable damage.
But there are also some pioneers like Sam Wiedmer that did it anyways and had great result. The card reader can be sticked to the VTX board with thermal double sided tape. It is better to cover the SD card reader with capton (polyamide) tape. Surprisingly the overheating is not an issue here, because the propellers are not covered by ducts and the air can pass between the PCBs.
 |
 |
 |
¶ Weights
 |
 |
¶ Setup for cinematic Shots
Camera Settings:
The ‘best’ settings will be a combination of the available options largely determined by the flying environment, lighting and specific look you want to achieve.
The settings shown below are a good place to begin and will likely suit most situations.
- Set the recording to 4k60
- If you know the light conditions and won’t be changing a lot during recording use fixed shutter speed and set it so it makes the image slightly dark.
It is easier to get the information from underexposed places in pictures than darken the overexposed parts of picture. - If you can use the lowest sensitivity ( ISO 100)
- If you need automatic shutter because you are recording an event whole day and the conditions are changing every minute, than use it. But set the EV to -0,7 or -1.0 so the image is still a bit darker. Don’t be afraid that you won’t see enough, there is also some postprocessing before the image is sent to goggles and it will be lighter.
- Also you can check the ideal ND filter (but most of you will have only ND8 that is enough for most of situations).
- The question of shutter speed is a personal choice. In some instances slower (1/60) will be better, for example slow and steady precise flying, however at times or when flying faster this can cause too much motion blur in which case faster (1/120, 1/240 or higher) may better suited. Start at 1/60 a work from there.
- Turn off the 3NDR and 2NDR filter, it will mostly mess the image and can be used only in low light conditions.
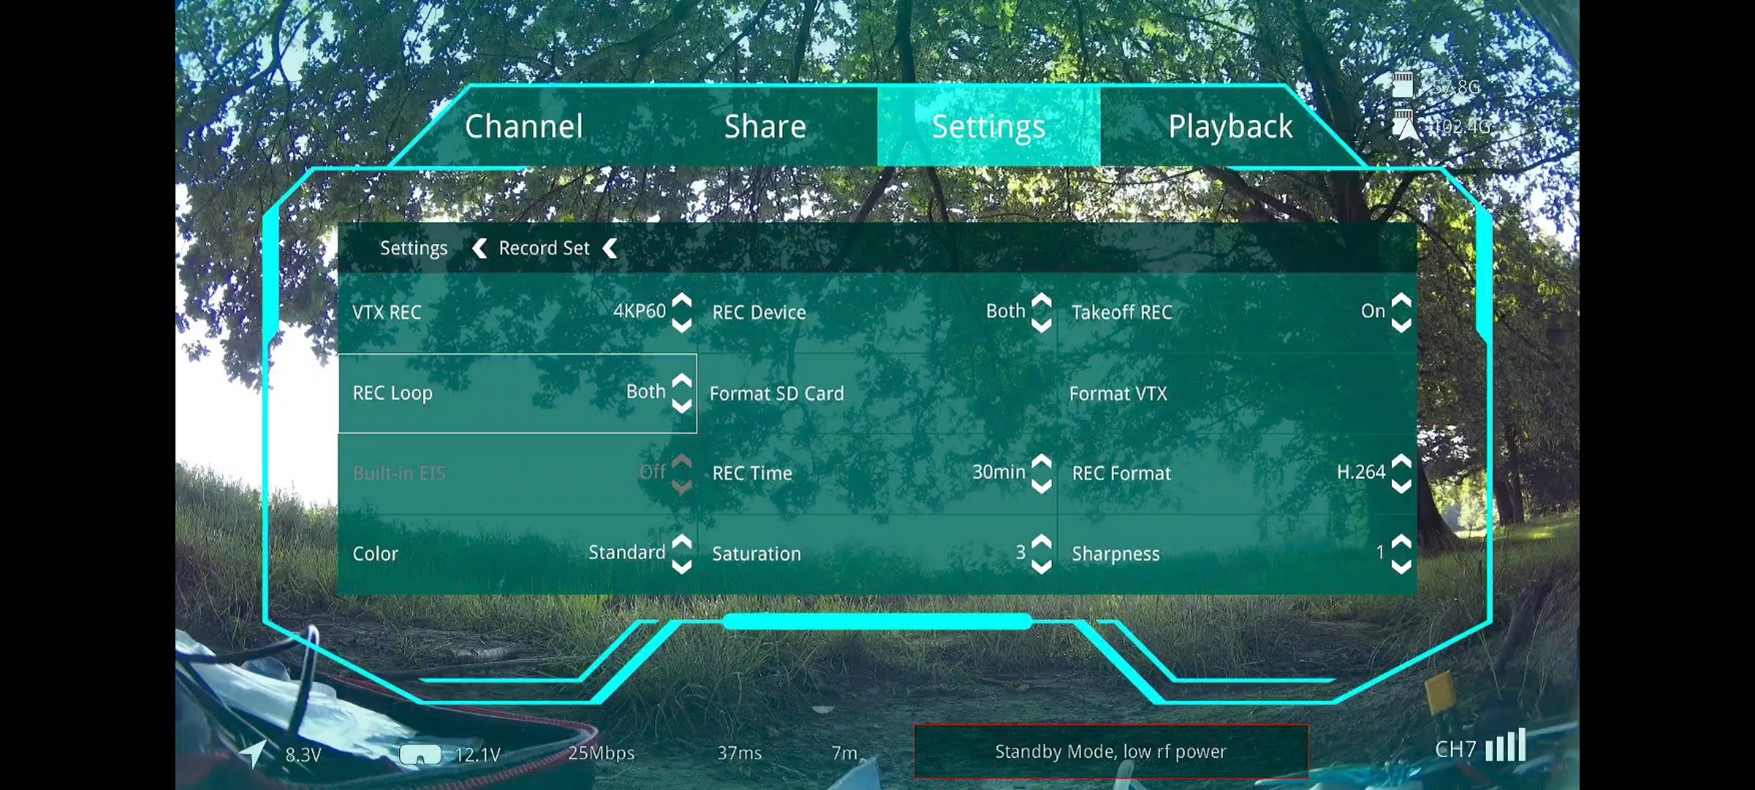
- Record Set -> Saturation: 4
- Record Set -> Sharpness: 1
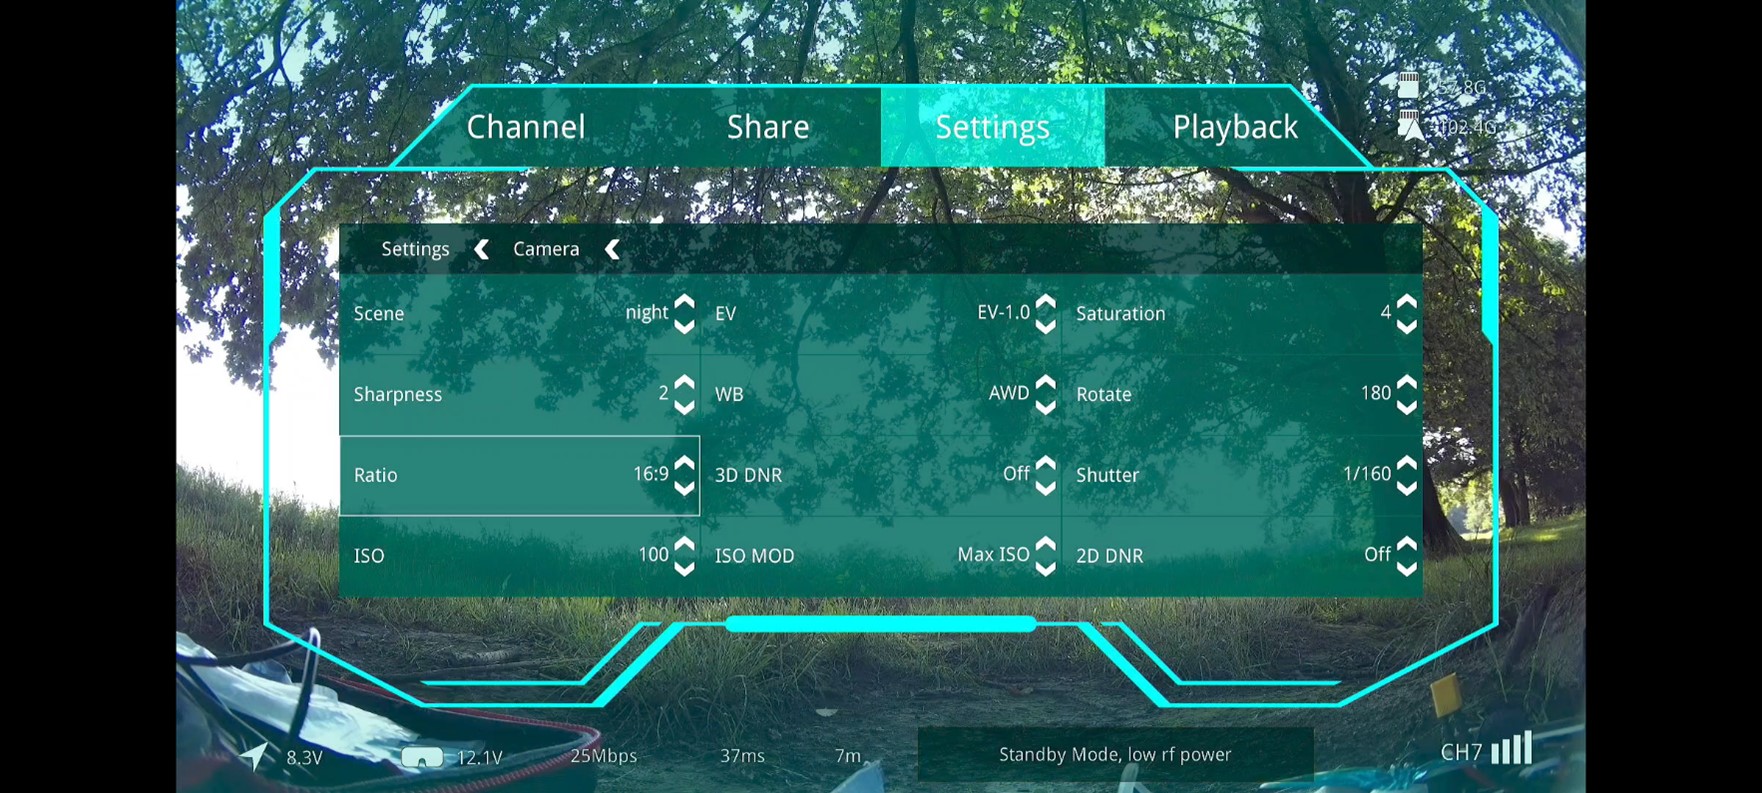
Video examples using the suggested settings from above: HERE and HERE
¶ Gyroflow Export Settings
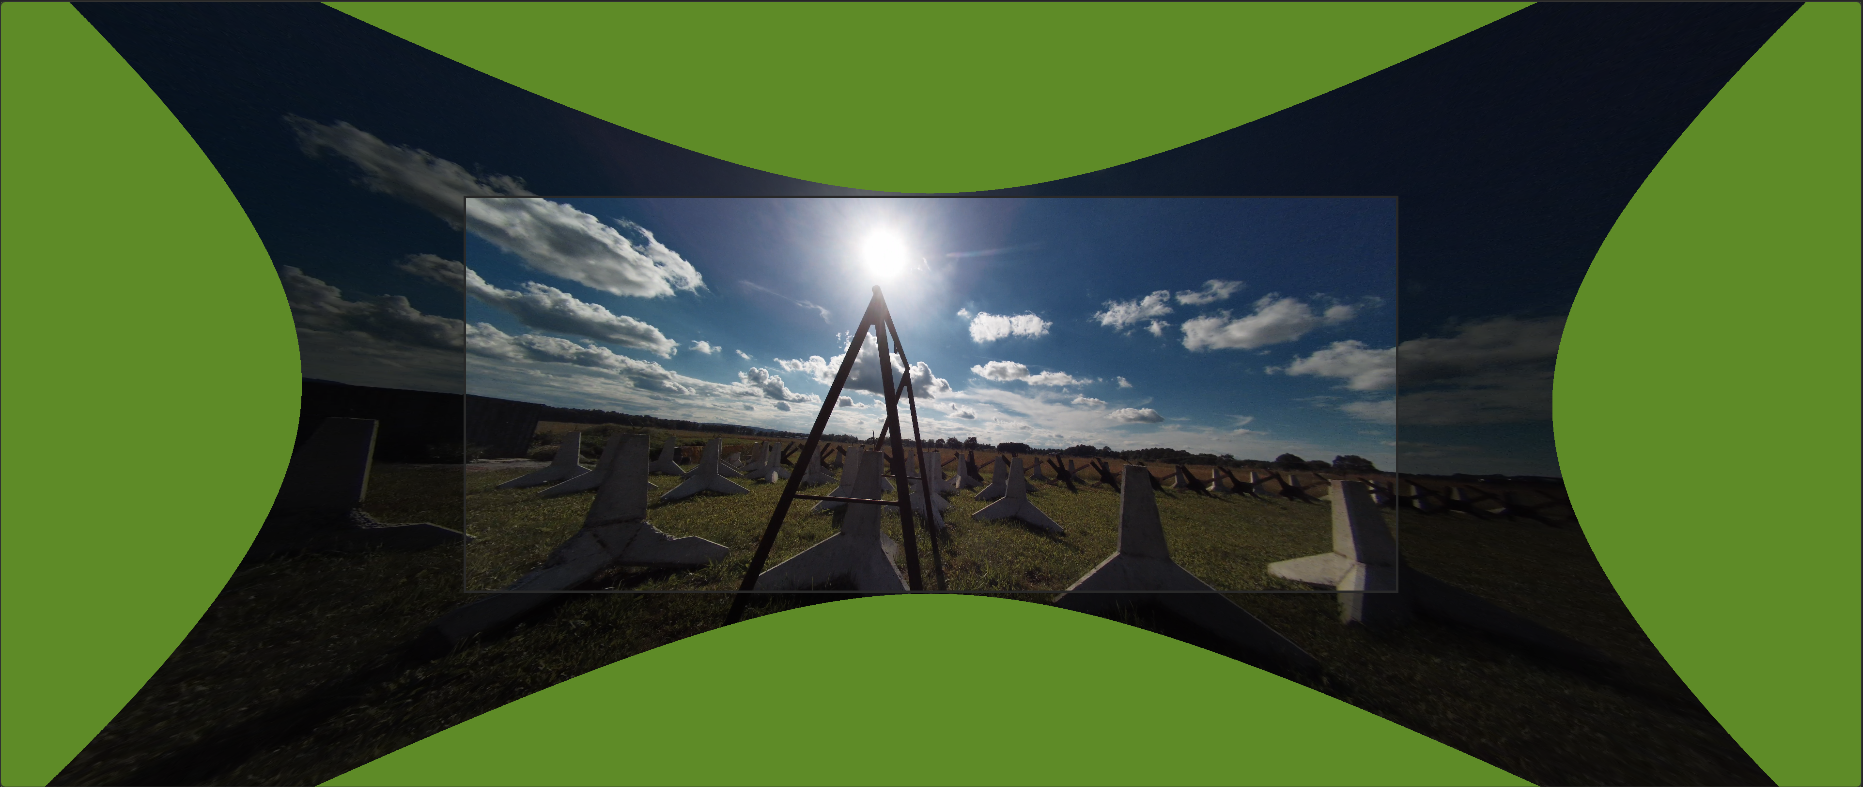
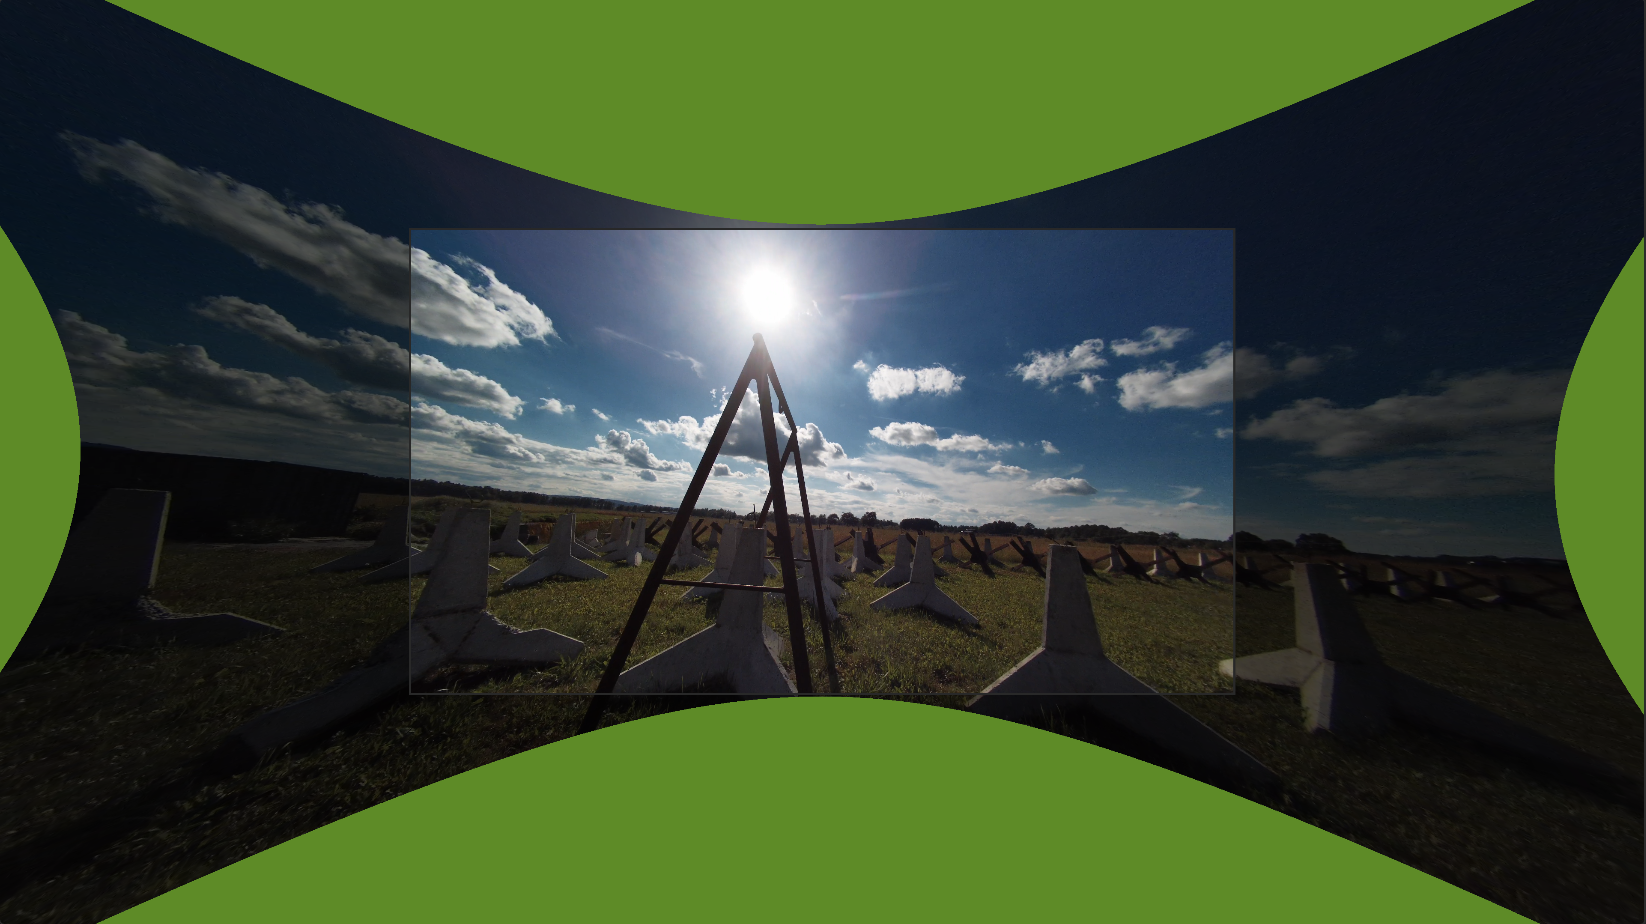
- Resolution 3840x1600 (because GF won’t let you set larger resolution for H.264 codec ) It is wider than 16:9 but is ensures better coverage of the stretched image after lens correction. You can see this in example below.
- Or you can use H.265 and to not lose any details during conversion use resolution 5184x2160.
- Bitrate 150 Mbps or higher
|
|
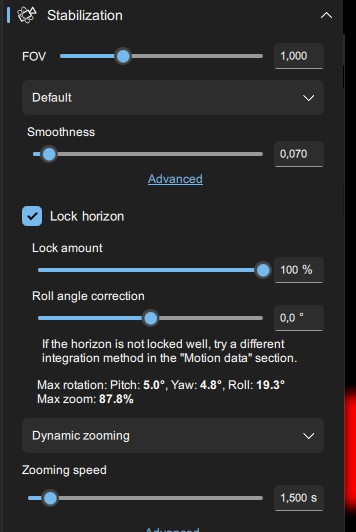
- For some cinematic footage it is nice to use “Lock horizon” function.
¶ Post Processing
Settings used during post processing will be a matter of personal preference, however given the settings shown above you will need to;
- Lighten the shadows
- Darken the Lights
- Add Saturation
- Output at a resolution of 3840 x 1620 (2,37:1) (for better use of 16:9 input)
¶ Conformal Coating and Improving Cooling Consistency
Why you should do it: Remaking the thermal coupling can solve uneven cooling of some ICs which can cause problems with DVR or transmission.
Why you shouldn’t do it: If you are not manually skilled, disassembling and reassembling the moonlight VTX could cause unrepairable damage!
Things you need:
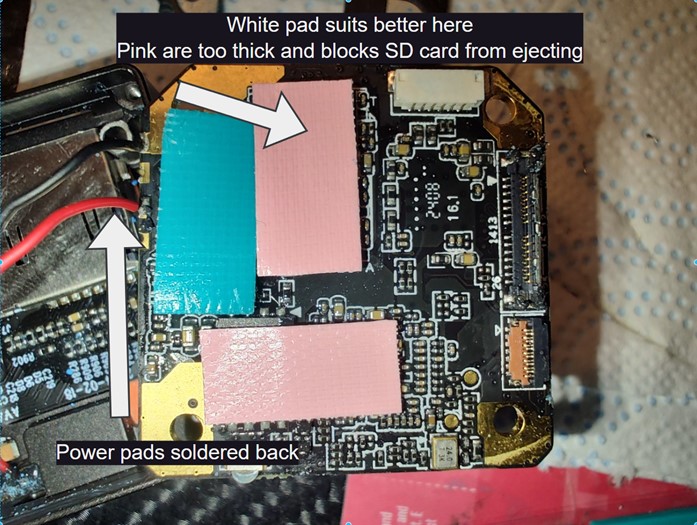
- Thermal pads (https://www.aliexpress.com/item/1005006100500869.html)
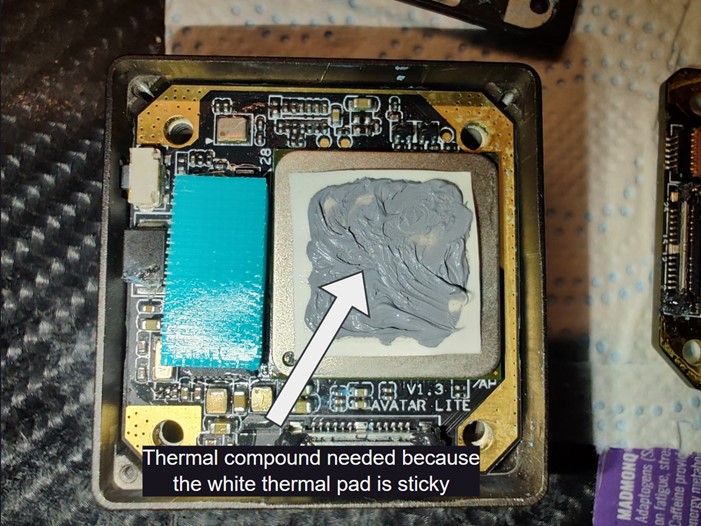
The white thermal pad is sticky so better to impregnate it with normal thermal paste to not stick on the other side. Otherwise you will not be able to get it disassembled again.

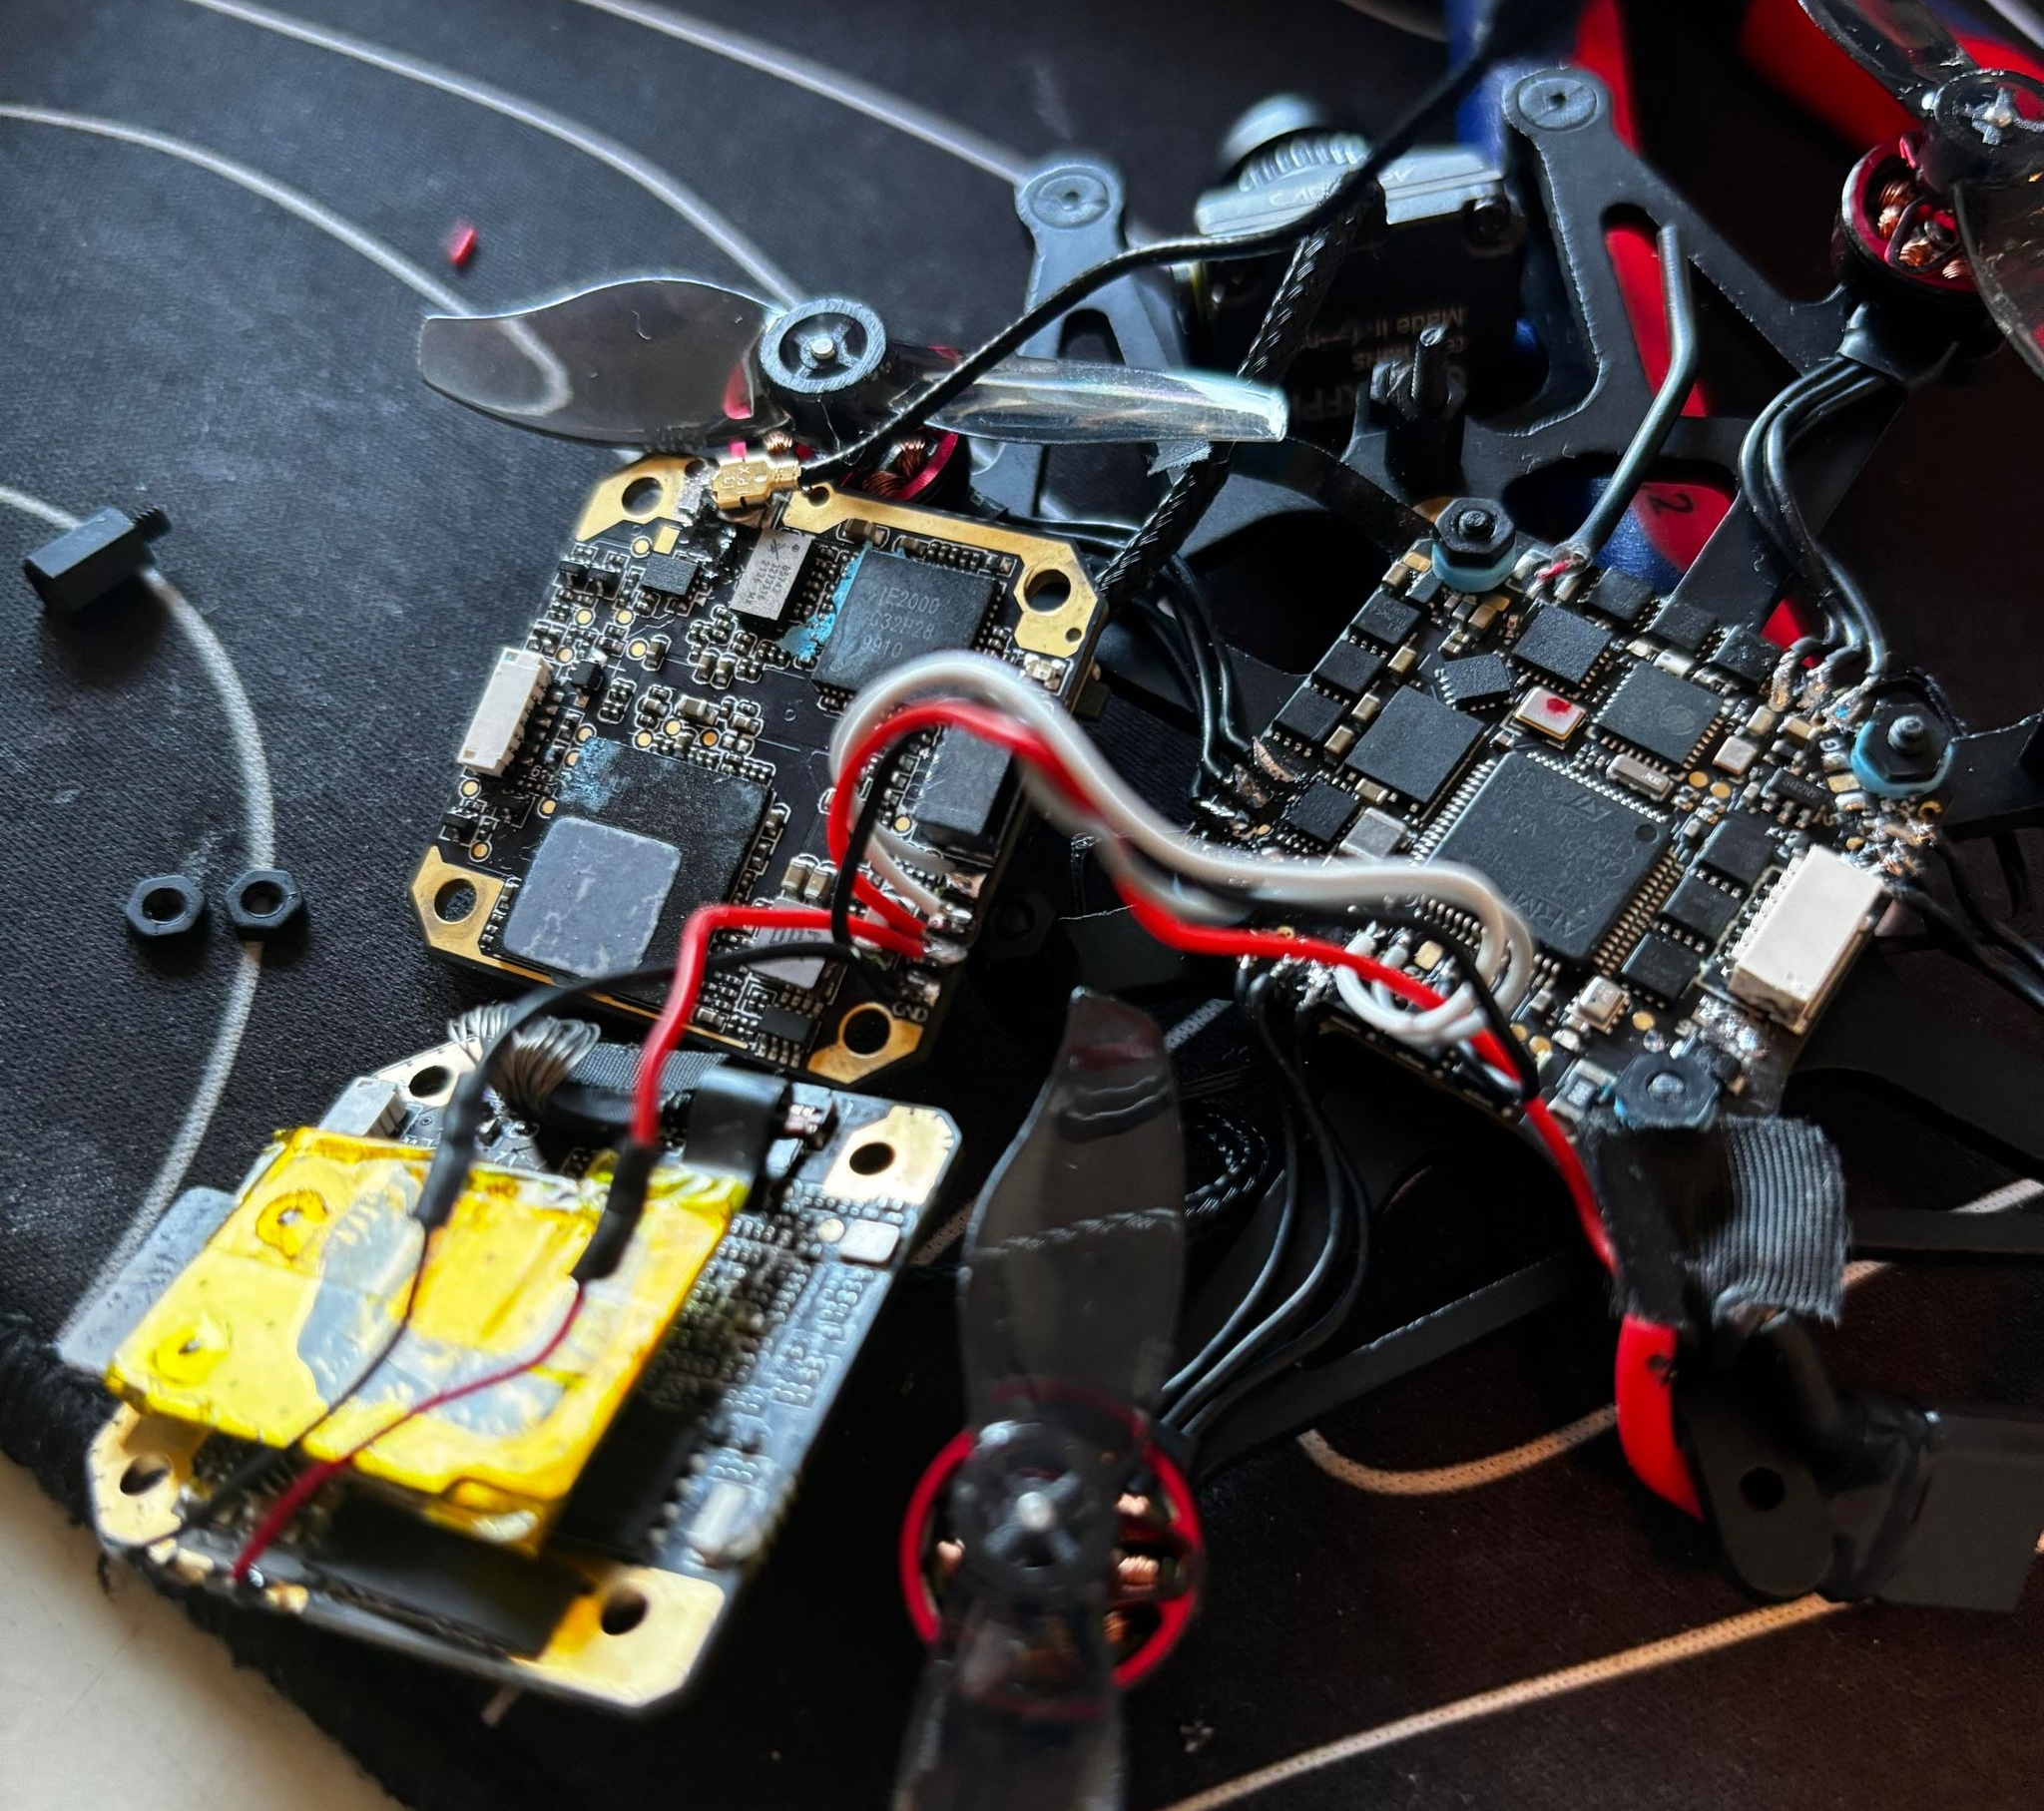
Disassembly:
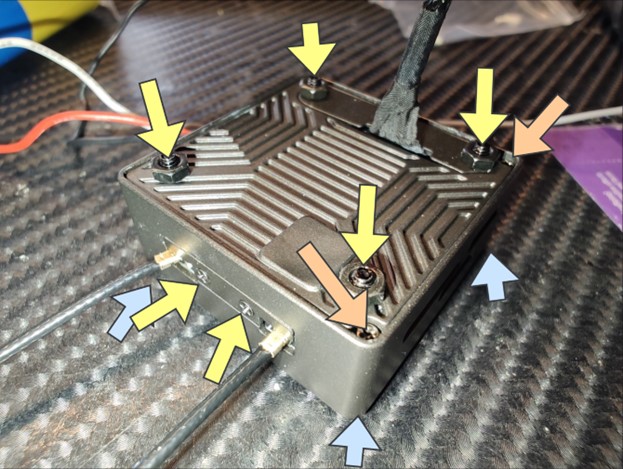
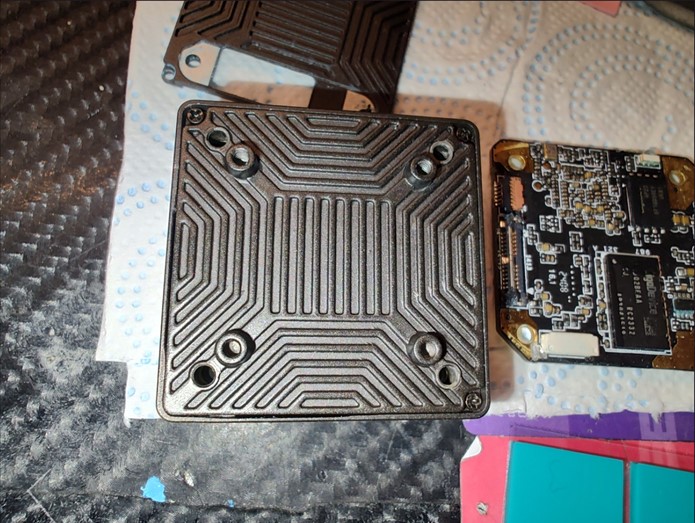
- Unscrew everything.
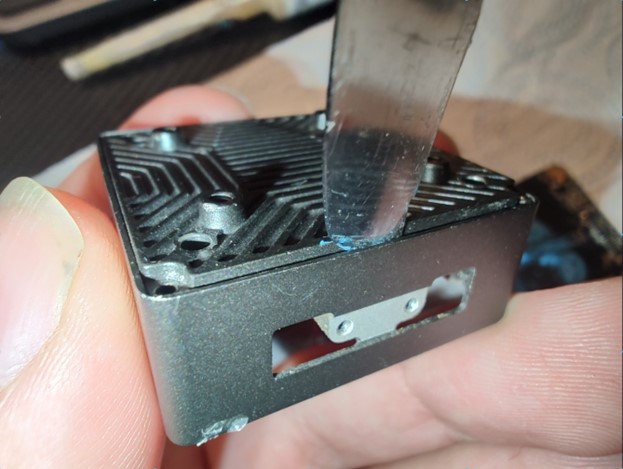
- Pry off the “upper” lid ideally with plastic prying tool, propeller or gently with some sharp knife and don’t go too deep so you won’t damage the PCB.
- Open it slowly because the thermal grease could be sticky and a bit hard on longer used units. Be patient.
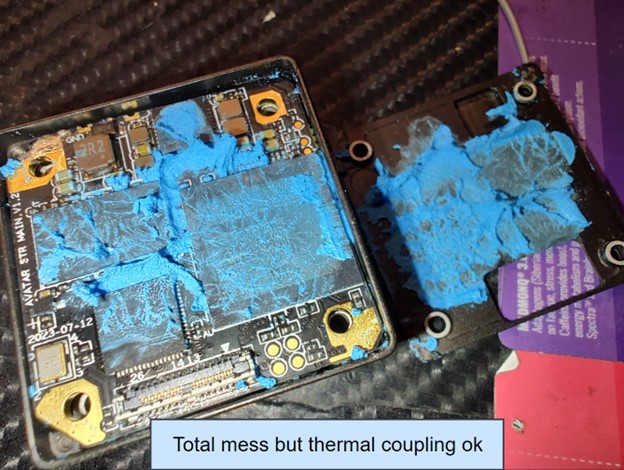
4. Now you can see the state of the thermal paste inside. For this (better version) I have, it’s more usable then the others.
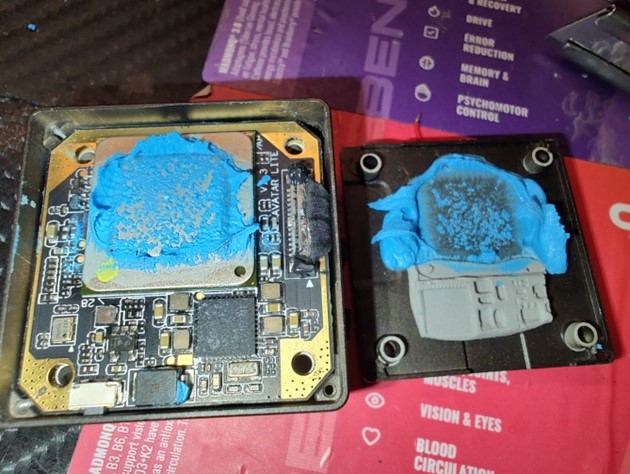
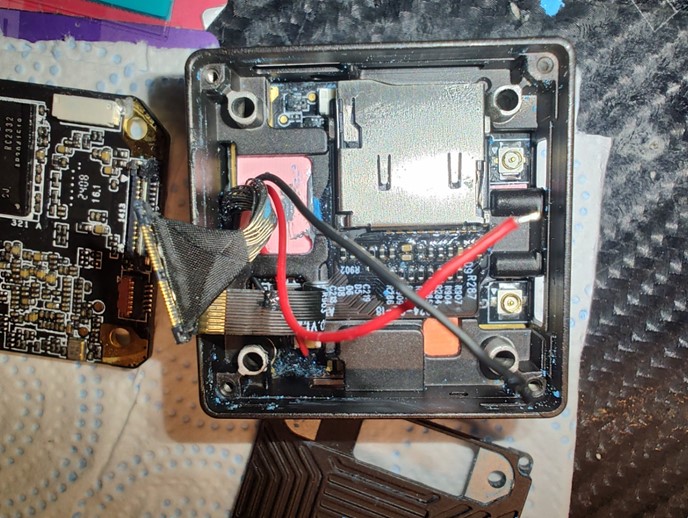
5. On The side when the main CPU is located, pull the PCB out by this specific corner to avoid damaging the flex cable.
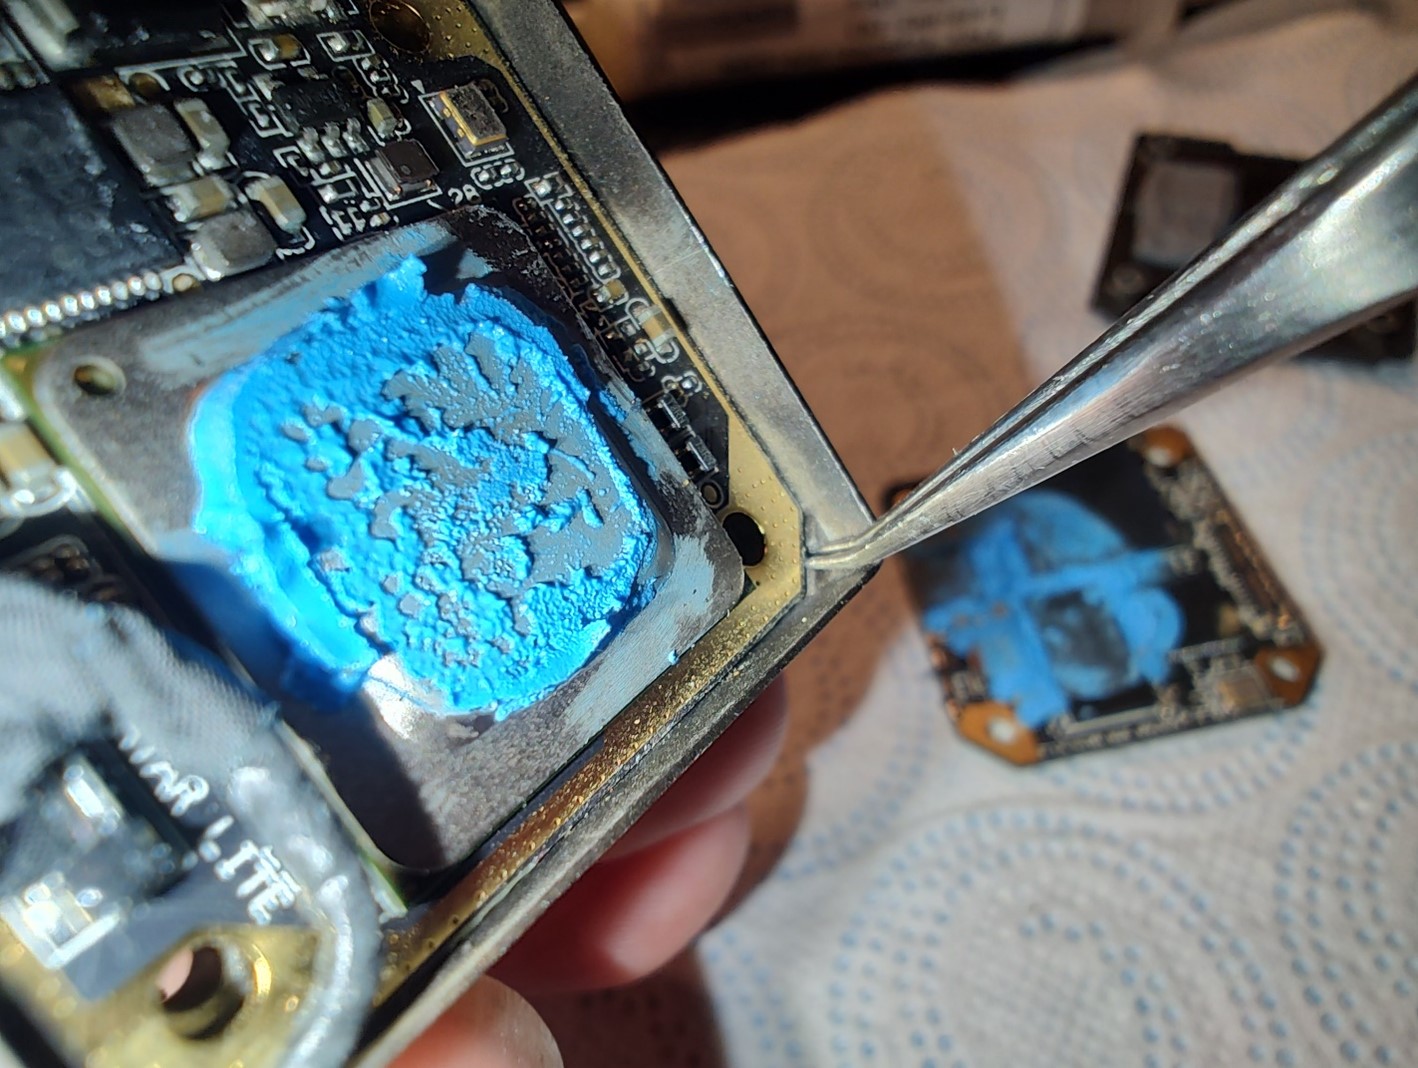
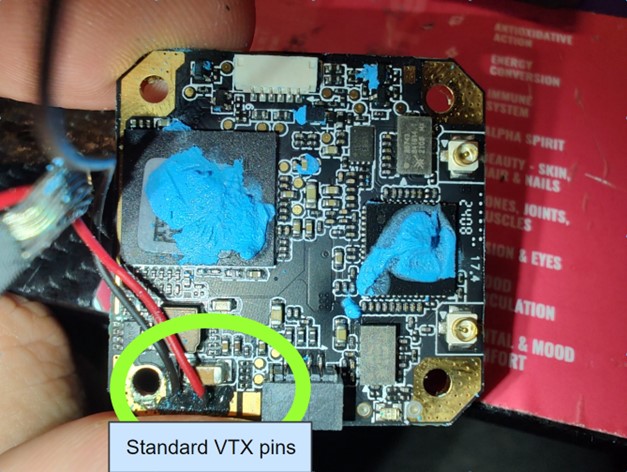
6. On lifted up PCB you have to desolder the VCC power line, disconnect MIPI cable and disconnect the flex cable for SD card.
Removing the power line cables could be tricky because they are sticked to PCB by silicone glue or something else.
Important Note: It definitely can be easier to desolder the power line on the second PCB because some boards has excessive amount of the silicon glue on the cable and it is hard to get off and you are risking that some SMT parts will come off with it.
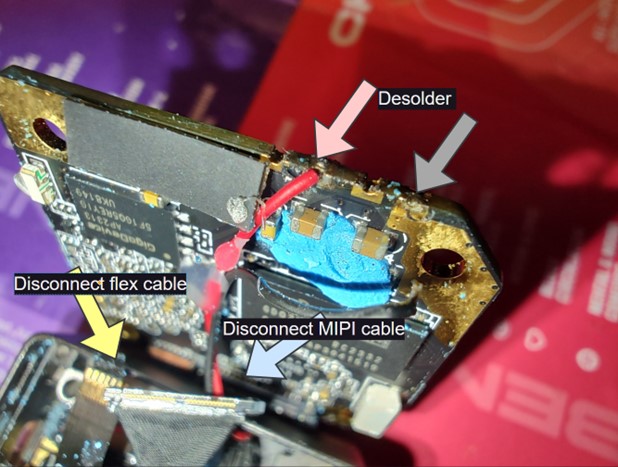
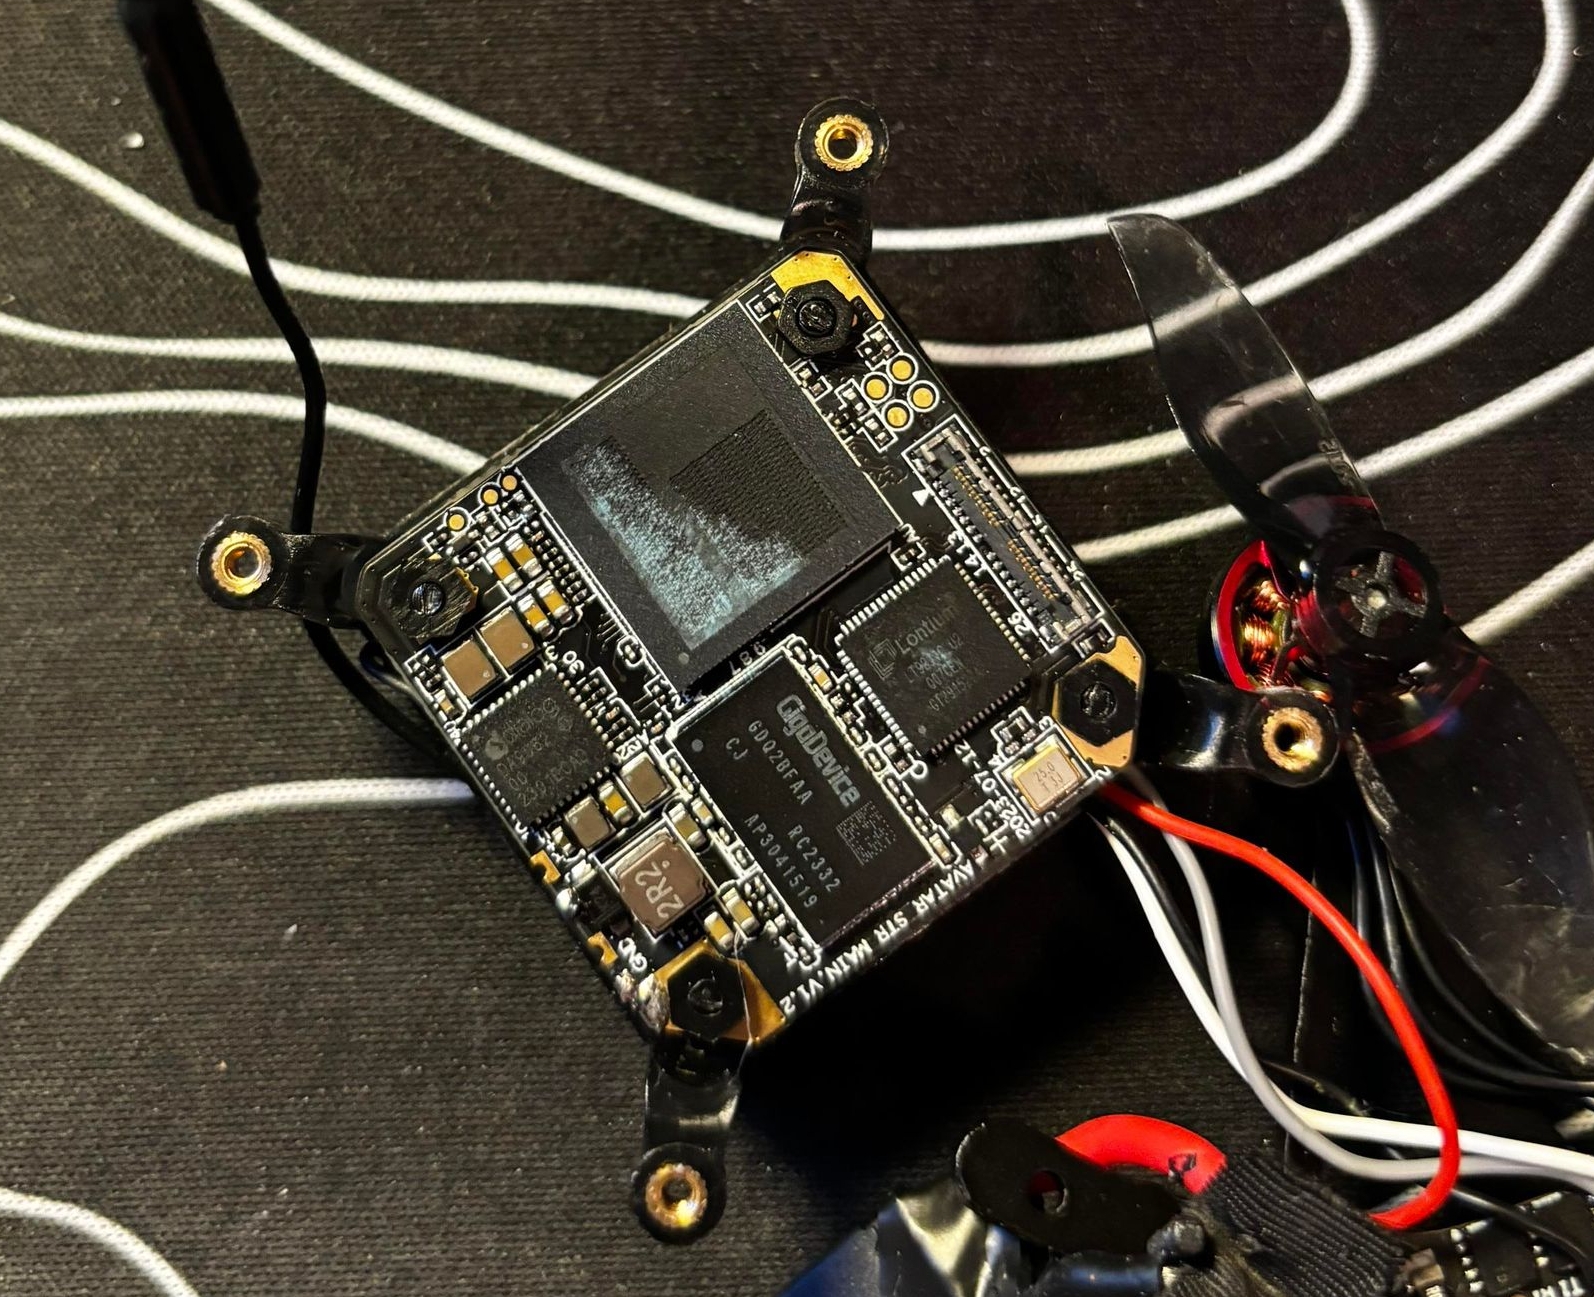
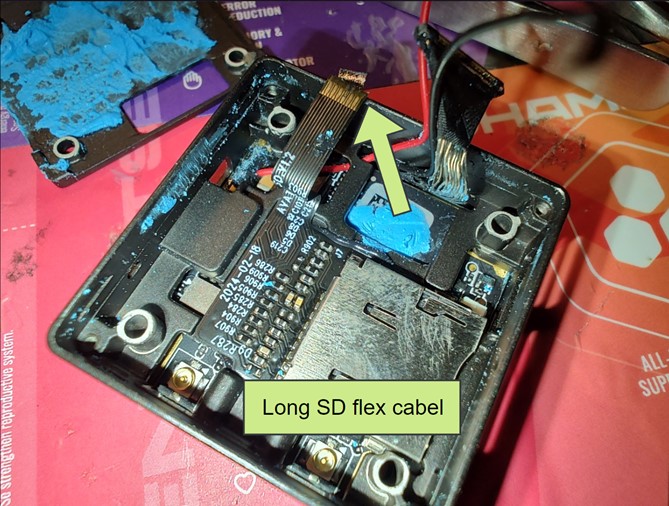
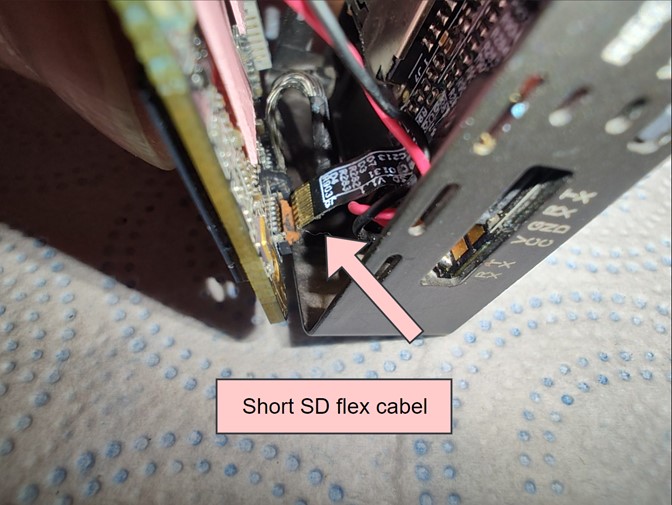
7. Now you can get to point that the FLEX cable can be short that connecting it back is really hard, or long enough to be reaching over the casing and then the connection could be done without any problem.
 |
 |
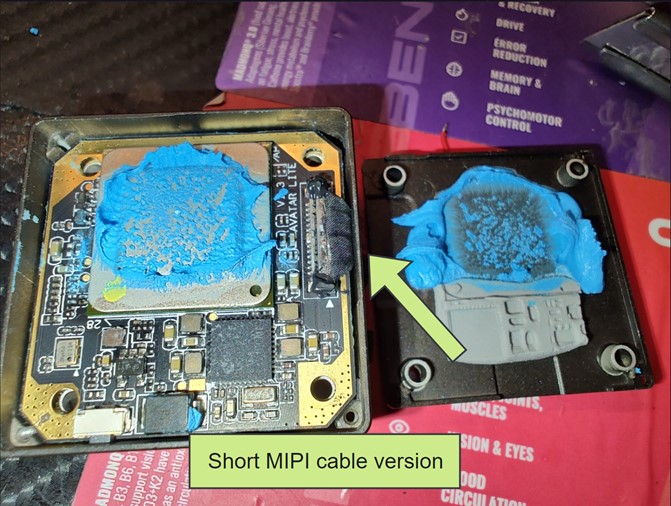
8. And also the MIPI cable can be done in different versions.
 |
 |
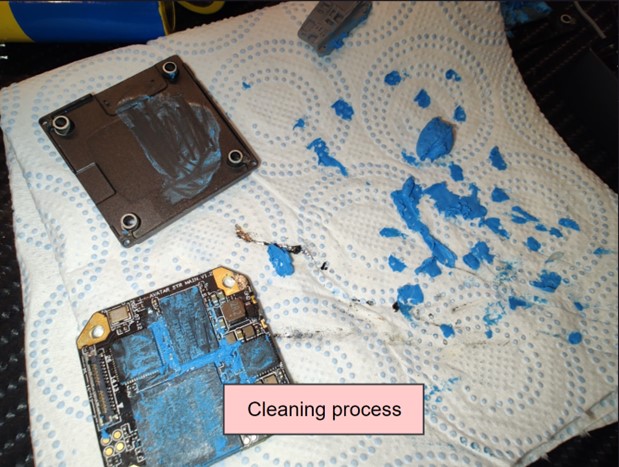
9. The VTX PCB is easy to pull out when everything is disconnected now. So now the cleaning part comes. Scrape the paste out with some used propeller or something.
After you scrape off most of the big chunks of thermal paste, use isopropyl alcohol and clean the rest with a toothbrush gently.
 |
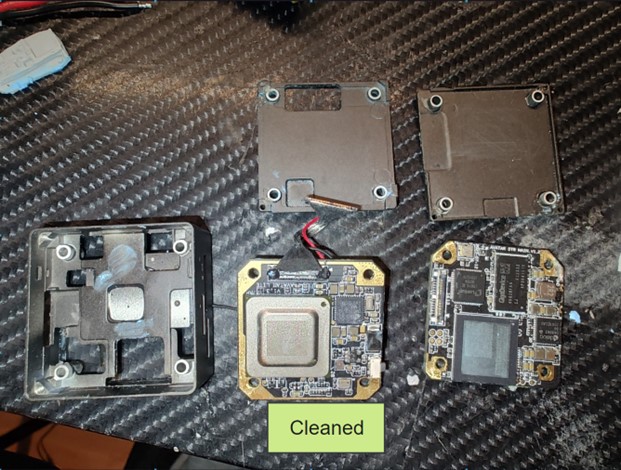 |
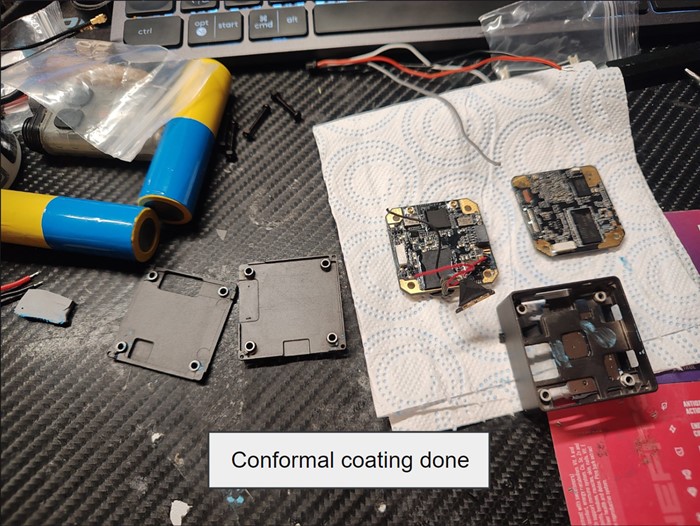
10. Use conformal coating on all boards but be really careful to not put the coating on IPEX connectors, MIPI connectors or any other tiny connector that should be clean!
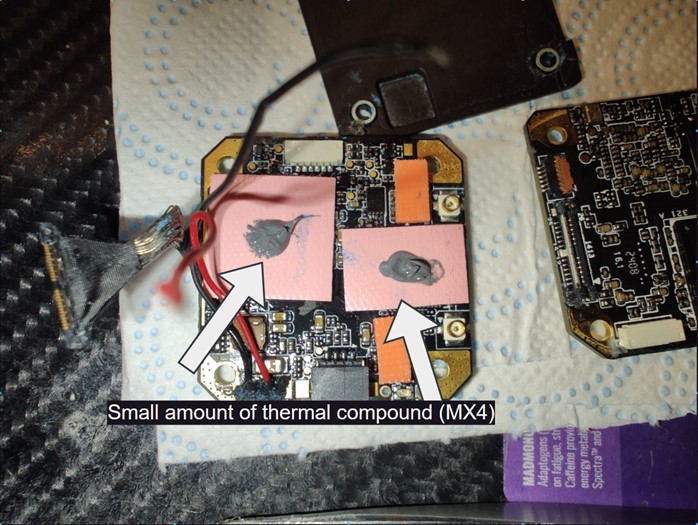
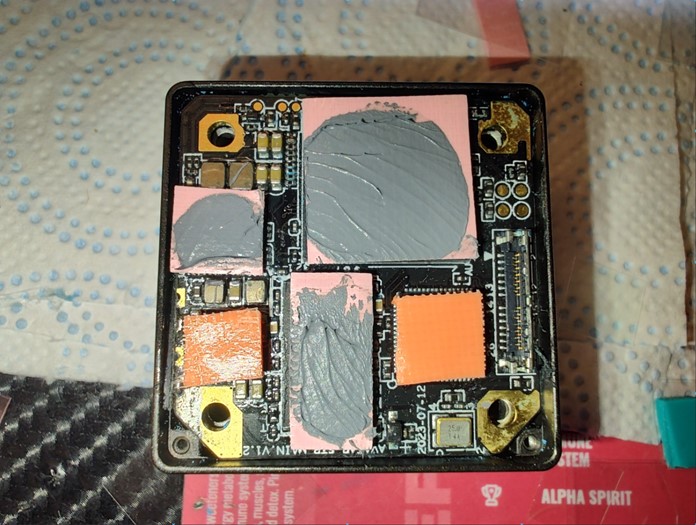
Now the thermal optimization. You can use the colours and the table of thickness of the thermal pads I put on at the beginning of this guide. I also use a small amount of standard thermal compound that is used on CPU in PC. Please use the pictures for the reference when applying the thermal pads on specific places.
 |
 |
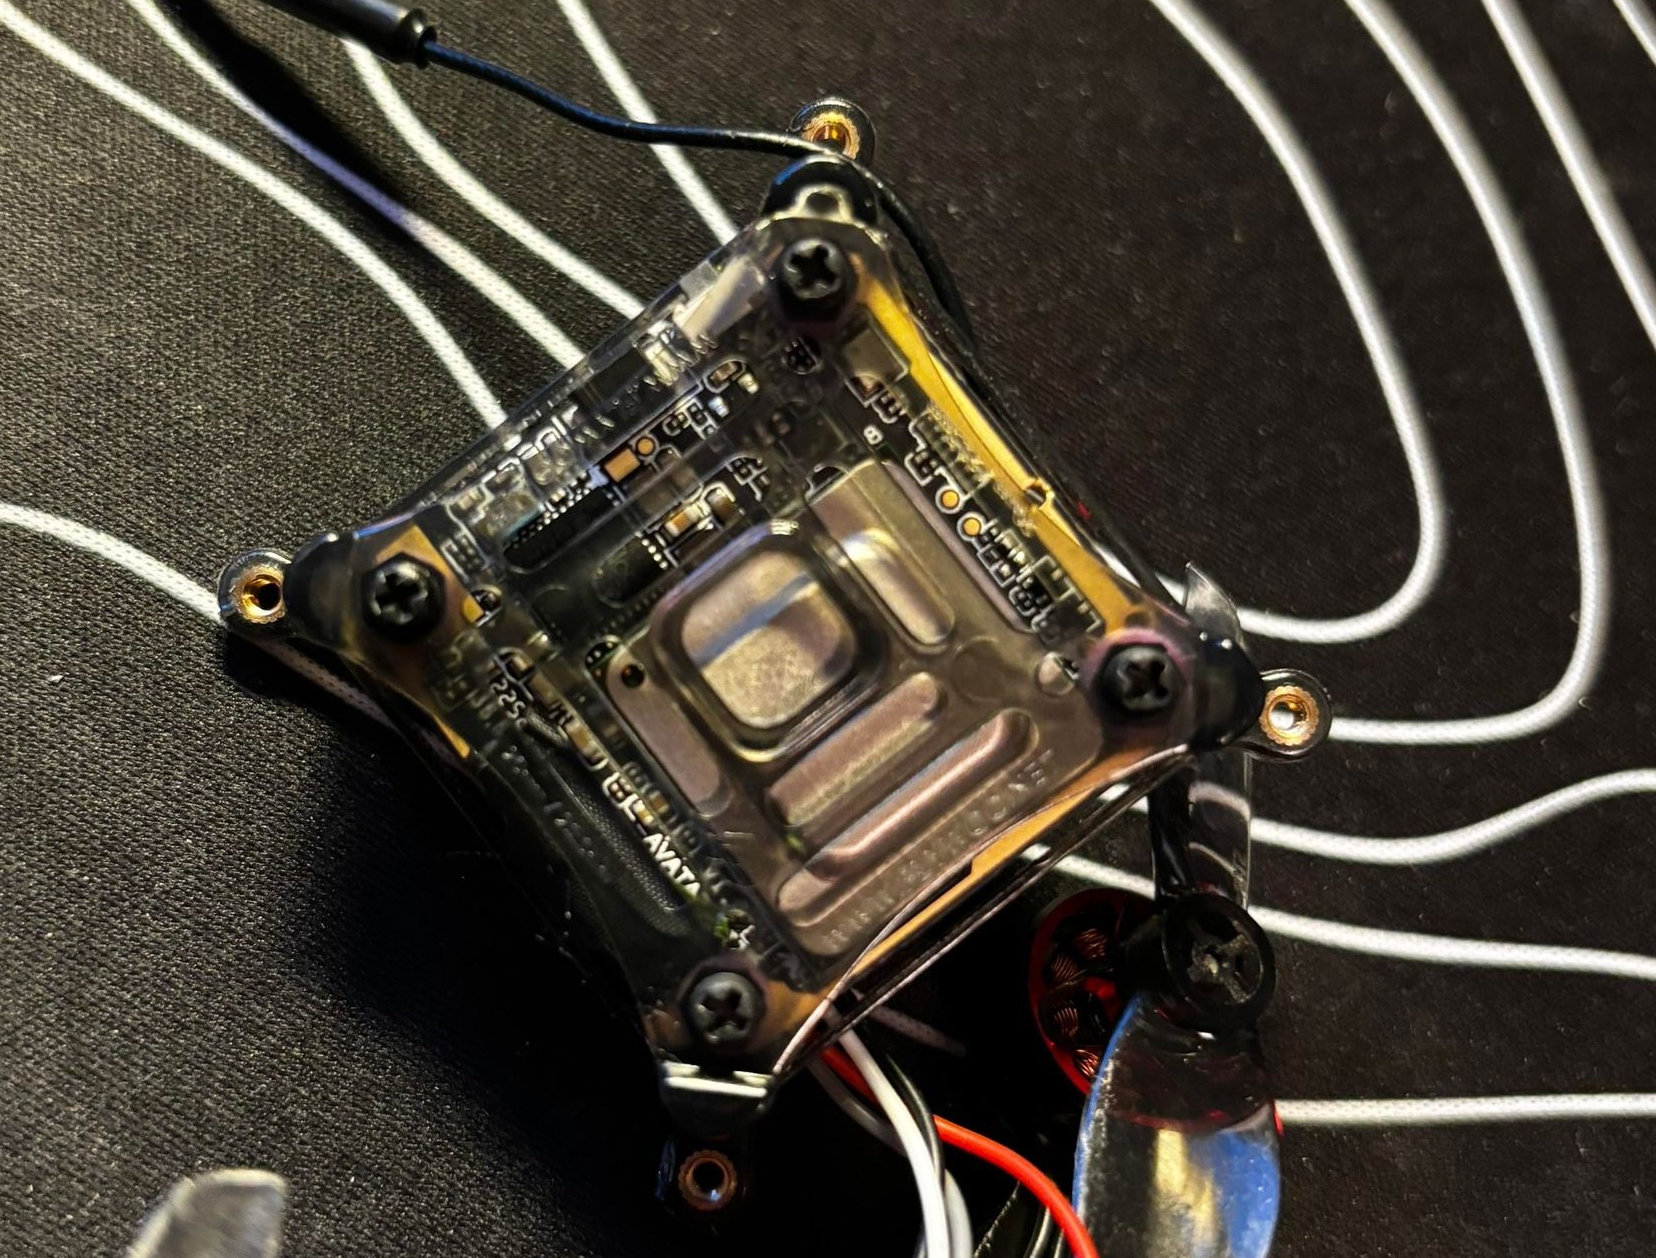
1.Now put the cables through the holes they were before disassembly.
2. Put on the lower cover and screw it in.
3. Now put the upper cover back on and screw it in.